October 03, 2023

How To Can Apples This Fall: A True Lemon Twist
Fall is such a beautiful season with vibrant colors, crisp air, and abundant harvests. Among the many seasonal fruits and veggies that define autumn, apples stand out as a seasonal staple! Colorful varieties line the markets, and apple picking is a fall pastime in many areas. Whether you've picked them yourself or bought them fresh from a local farm, canning apples is a fantastic way to preserve their delicious flavor and enjoy them all year long.
In this blog post, we'll guide you through the process to learn how to can apples for the fall, with a special twist using True Lemon to enhance the flavor and extend the shelf life.
Why Can Apples?
Perusing apple orchards and canning apples have been beloved traditions for generations. It not only allows you to savor the taste of fall throughout the year, but it’s a great way to reduce food waste and keep a supply of nutritious fruit on hand. And using True Lemon citrus wedges gives you a unique citrusy zing that beautifully complements the sweetness of the apples.
Select apples that are locally grown for a bright seasonal flavor. Baking apples work best because they hold up really well when cooked. And while taste is your preference, you may prefer apples that are both a little sweet and a little tart. Try Fuji, Granny Smith, Pink Lady or Honeycrisp as some great options to start with.

Ingredients:
For this True Lemon-infused canned apple recipe, you'll need:
- 8-10 pounds of apples (variety of your choice)
- 2 cups sugar
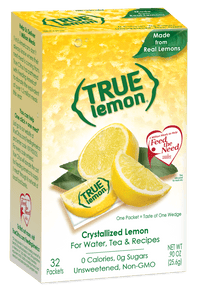
- 12 packets True Lemon dissolved in water (equivalent to the juice of 2 lemons)
- 1 teaspoon cinnamon (optional)
- 1/2 teaspoon nutmeg (optional)
- Water
- 6-8 sterilized canning jars with lids and bands
- A large pot for boiling water (canning pot)
- A jar lifter
- A canning funnel
- A bubble remover or non-metallic spatula
Step-by-Step Canning Instructions

1. Prepare Your Apples.
First, wash and peel your apples. Core and slice them into uniform pieces, about 1/2 inch thick. (You can also cut into quarters or chunks if you prefer and leave the peel on for added texture and color!) As you slice the apples, place them in a large bowl of water with the True Lemon juice added to prevent browning. Using lemon juice in place of ascorbic acid, not only preserves the color but also infuses a subtle lemony flavor into the apples.

2. Create the Syrup.
In a large pot, combine 2 cups of granulated sugar with 6 cups of water. Stir until the sugar dissolves completely. This is where you can also add those optional ingredients – 1 teaspoon of cinnamon and 1/2 teaspoon of nutmeg. Add these to the light syrup for a warm and cozy flavor.

3. Blanch the Apples
Drain the apple slices from the water and blanch them in boiling water for 1-2 minutes. This helps preserve the apples' texture and color. After blanching, transfer the apple slices to a bowl of ice water to stop the cooking process.

4. Fill Your Canning Jars
Use a canning funnel to fill each sterilized canning jar with apple slices, leaving about half an inch of headspace at the top. Pour the hot syrup over the apples, maintaining the half-inch headspace. Make sure the apples are completely covered by the syrup to prevent oxidation.

5. Remove Air Bubbles.
Insert a bubble remover or non-metallic spatula into the jar to remove any trapped air bubbles. Then, wipe the jar rims clean with a damp cloth to ensure you get a proper seal.

6. Apply Lids and Bands.
Place the sterilized lids and bands on each jar, screwing them on just until they are fingertip tight. This allows air to escape during processing and ensures the jars are sealed well.

7. Process the Jars.
Place the filled and lidded jars in a canning pot with enough hot water to cover them by at least an inch. Bring to a boil and process the jars for 20-25 minutes. You may need to adjust the processing time if you live in a high-altitude location. After processing, turn off the heat and allow the jars to sit in the hot water for 5 minutes before carefully removing them with a jar lifter.

8. Cool and Store.
Place the hot jars on a clean towel or cooling rack and let them cool completely. You'll hear the satisfying "pop" of the lids as they seal. Once cooled, check the seals by pressing down on the center of each lid. If the lid doesn't move, the jar is well sealed. If it pops back, the jar did not seal properly and should be refrigerated and consumed within a few weeks. Label the sealed jars with the date and store them in a cool, dark, and dry place. Properly canned apples can last up to 18 months.
Enjoy your True Lemon-infused canned apples!
Your canned apples will add a burst of fall flavor to anything your heart desires! Here are some ideas on delightful ways to enjoy them.
- Straight from the Jar: Grab a spoon and enjoy these sweet and tangy apples as a quick and sweet snack!
- Apple Pie Filling: Use your canned apples as a ready-made filling for pies, crisps, cobblers, or turnovers. Just add them to a pie crust or pastry of your choice and bake.
- Pancake and Waffle Topping: Warm up your canned apples and spoon them over pancakes, waffles, or French toast for a delicious and comforting breakfast.
- Oatmeal and Yogurt: Elevate your morning oatmeal or yogurt by topping them with a generous spoonful of canned apples. Or even on this tasty rice pudding!
- Dessert Topping: Serve your canned apples as a delicious topping for ice cream, cake, or cheesecake.

Canning apples is a wonderful and rewarding way to capture the essence of the season and enjoy the flavors all year long. This True Lemon-infused canned apple recipe not only preserves the apples' natural sweetness but also brings a zesty citrus note to your favorite dishes and desserts. So go out and stock your pantry and get ready to savor the essence of fall whenever you want!

- Made from Real Citrus
- Simple, Non-GMO Ingredients
- Unsweetened; 0-Sugar, 0-Calories
- NO Artificial Sweeteners

Written by
Amy Cimo is a Nutrition Coach, Personal Trainer and Wellness Enthusiast based out of Baton Rouge, Louisiana. After going through her own health journey, she found her passion in helping others find balance between nutrition, physical activity and mindset to live healthy and be truly happy. Amy attended Louisiana State University where she received a Bachelor of Arts in Mass Communication and a Bachelor of Science in Business Administration. She became a Certified Personal Trainer in 2021 through the National Academy of Sports Medicine (NASM) and a Certified Nutrition Coach in 2022 through Precision Nutrition.
More on Recipe Recommendations